How to Install IIS 7
How to install IIS 7 on Windows Server 2008?
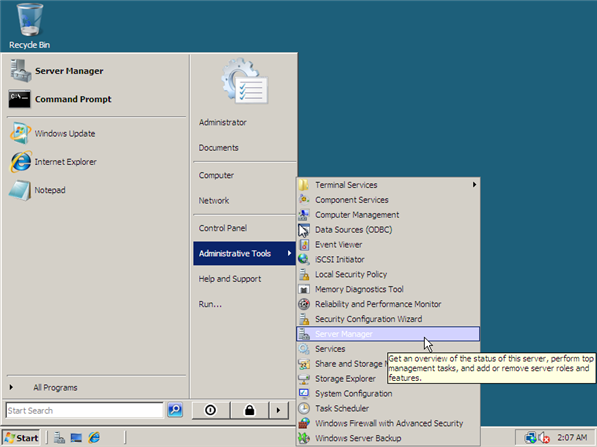
Step 1: Click on Start and click Administrative Tools then select Server Manager.
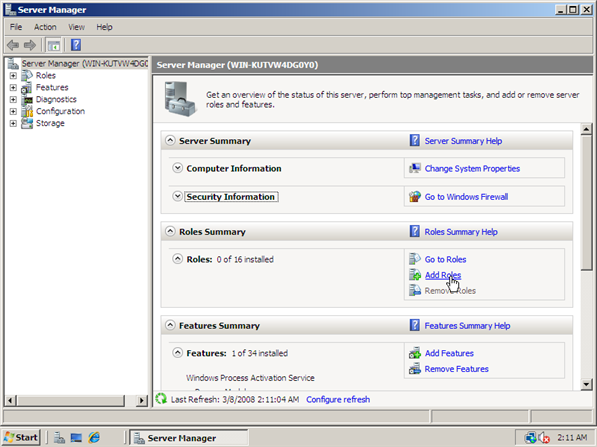
Step 2 : Right Click on Roles and click on Add Roles
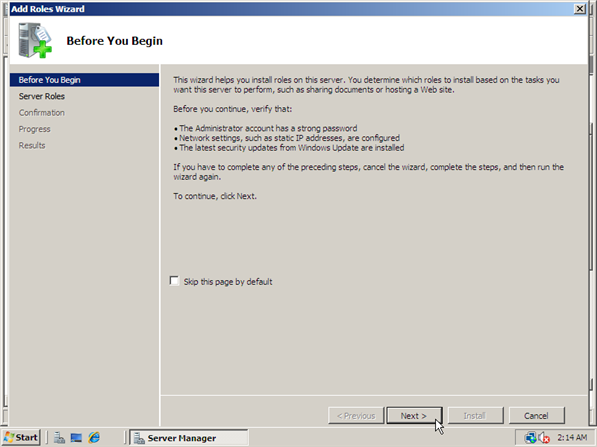
Step 3: Before you Begin
This wizard helps you install role on this server. you determine which roles to install based on the tasks you want this server to perform, such as sharing documents or hosting a website.
To continue, Click Next.
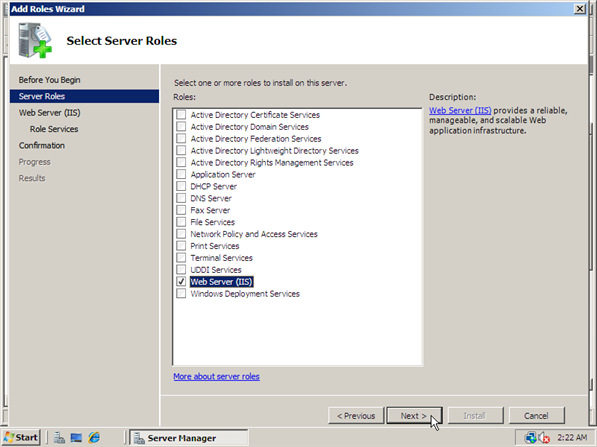
Step 4: Select Servers Roles wizard displayed on system screen
Select Web Server (IIS) and then click Next to continue
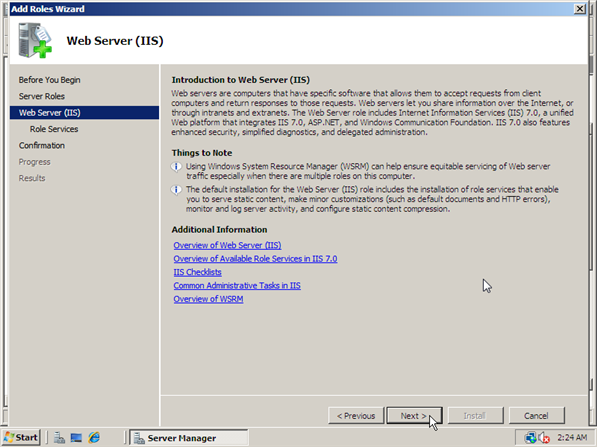
Step 4: Web Server (IIS) wizard displayed on system screen.
Click Next
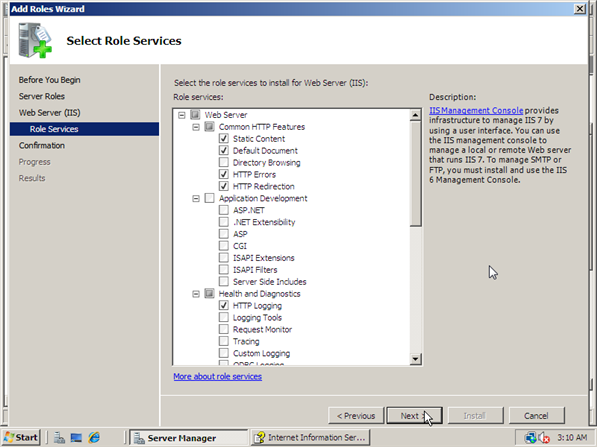
Step 6: Select Roles Services
Select the role services to install for Web Server (IIS)
Then click on Next
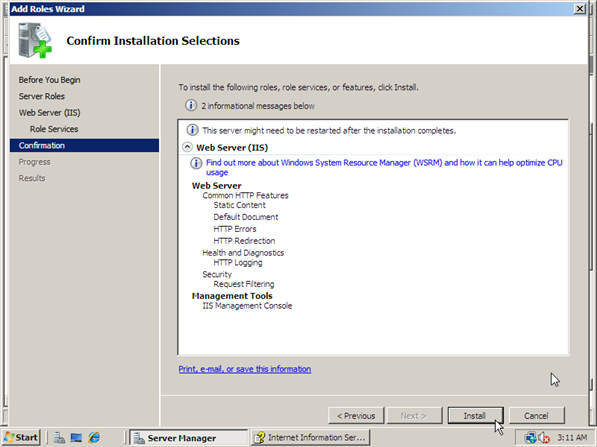
Step 7: Confirm Installation Selections
To install the following roles, role services, or features, click Install.
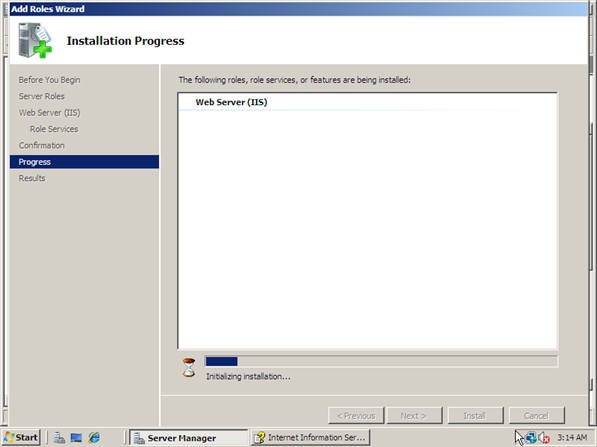
Step 8: Installation progress wizard displayed on system screen.
and then click on Install and Installation process will be start.
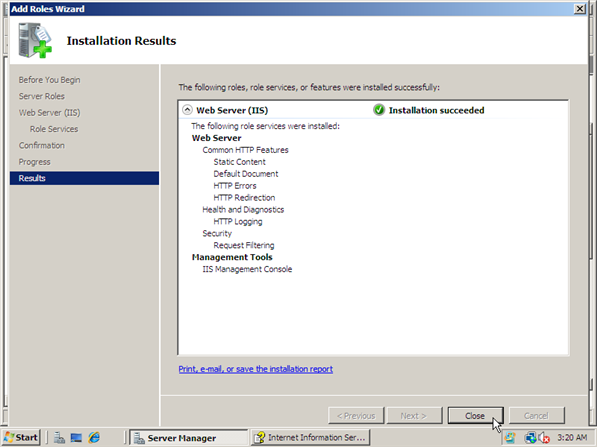
Step 9: Installation Results
The following roles, role services, or features were installed successfully:
After completed installation process this wizard display on your system screen.
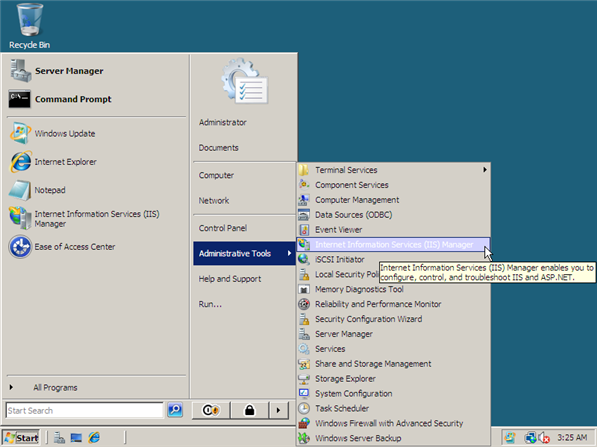
Step 10: Click on Start and click Administrative Tools then select Internet Information Services (IIS) Manager.
Step 11: Expand Web server and then expand sites folder. Right Click on Sites and click on Add web site.
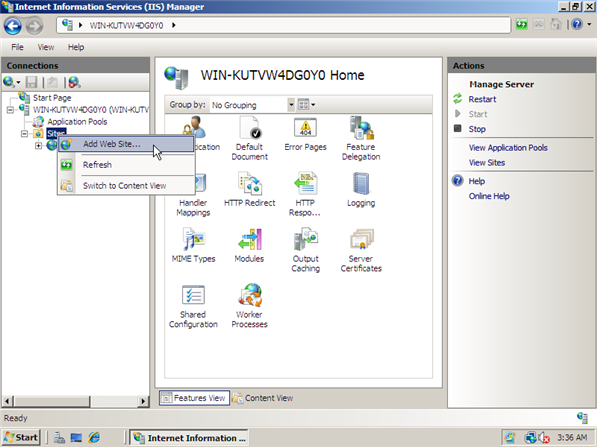
Step 12: Add Web site wizard displayed on system screen.
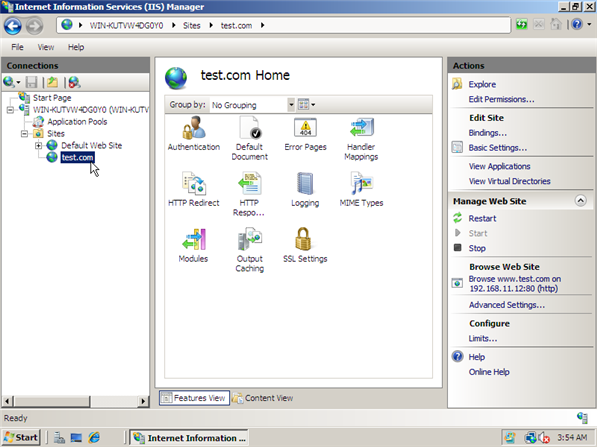
Following these step to create a new web site
Site Name: test.com
Physical Path: C:\inetpub\test
Type : Http or Https IP address: 192.168.11.12 Port: 80
Host name: www.test.com
Then click Ok.

Step 13: Change Html file in default document directory and restart service.
Now IIS Web server installed and configured.
Tags:
IIS
Window server

0 comments